Wednesday, February 24, 2021

Sunday, February 21, 2021
Thursday, February 11, 2021
Saturday, January 30, 2021
Tuesday, January 26, 2021
Sunday, July 12, 2020
Tying the Twisted Damsel

It only took me a 5 years to get the editor, David Klausmeyer to let me submit it. I suspect he wondered what my deal was with tying tiny flies using marabou and finally thought, if I don't let this guy submit this thing I'll never hear the end of it. Or, who knows he may have forgotten the other half-dozen queries he'd dumped from his inbox over the past few years. At any rate, I'm happy with the end results and did I mention IT'S A GAS seeing your work in print?

Okay, moving on.
Since the article cycled through Fly Tyer's Facebook page I've had a couple requests to do full tutorials on a couple of the featured patterns, the Shape Shifter is next up. This request came from Clay Williams. It's taken me a bit to get to it but I am glad to do it because it gives me a chance to further explain some things there just wasn't editorial editorial space to cover, so here it is, Tying the Twisted Damsel.
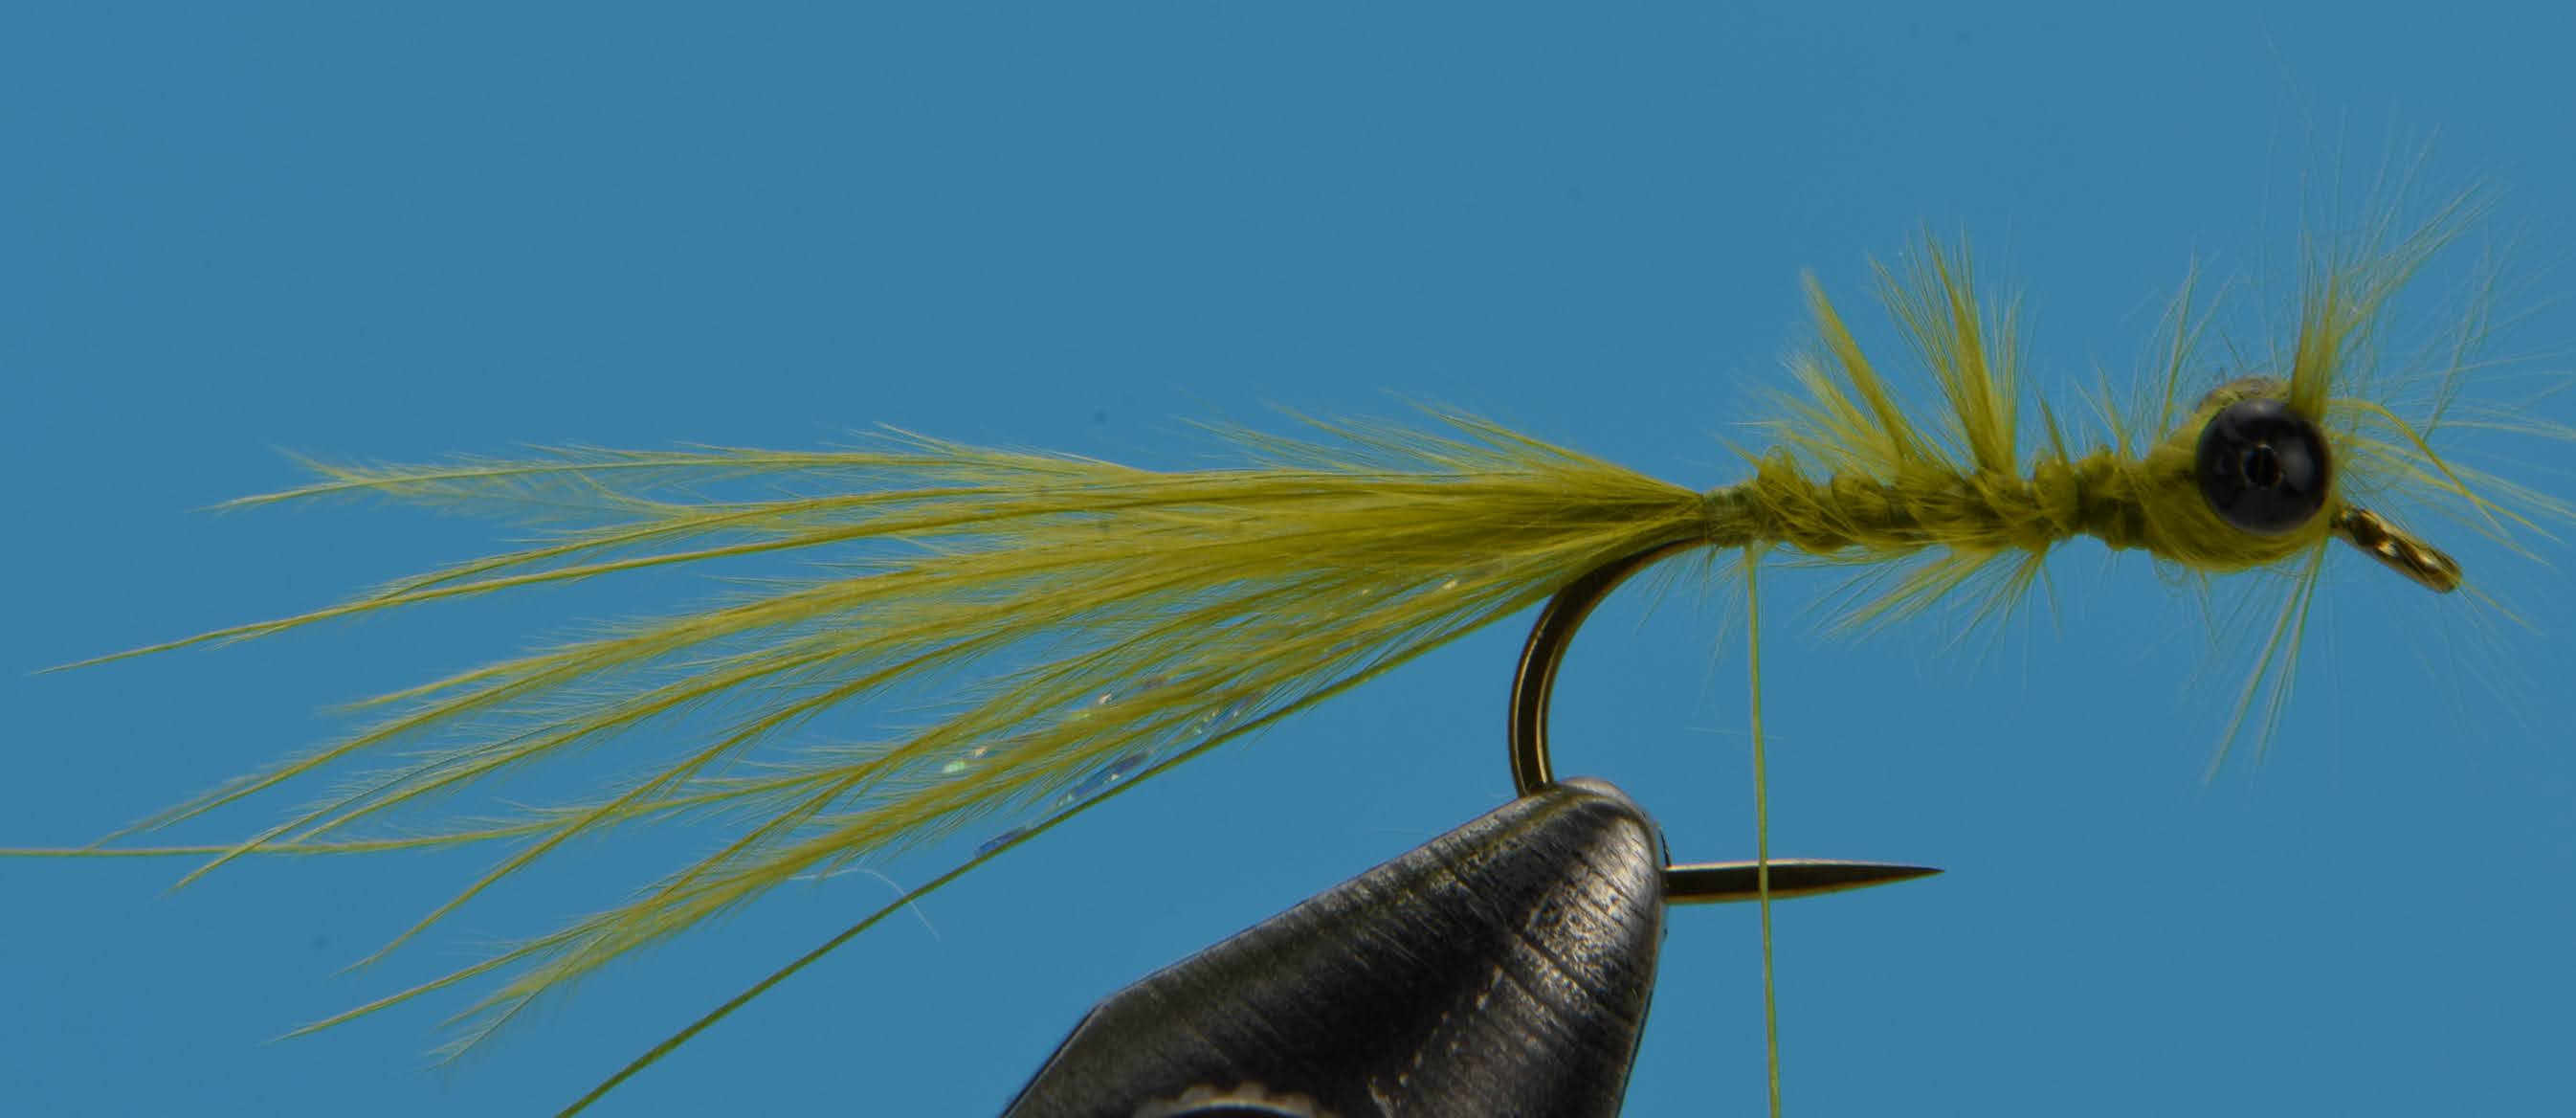
This is the first marabou fly I devised and tied using the twisted rope technique that really tripped my trigger, mostly because within days of tying the first ones I was catching lots of stillwater trout with it. The beauty and the point of it is that this things is quick and simple to tie once you have the sequence, additionally it doesn't have to be perfect to be effective. The main thing I try to achieve with the fly is a long, flowing tail and wide, dense looking body. Depending on the color of the local damsels I change out the eyes to compliment the color of the fly and still have some contrast.
The fly swims hook point up making it pretty weedless and the hook up rate on takes is fantastic. The hook usually ends up solidly in the front part of the mouth. It was designed for trout but has proved, somewhat to my surprise, to be a great fly for all manner of warmwater fish, sunfish, crappie, largemouth and even carp, go figure.
Enjoy the tutorial and if anyone has any questions please leave a comment here so everyone can share the answers. I will be doing more of the other flies as time permits between magazine work, tying and a tying book that seems to be taking forever.
For those who would rather buy that tie your flies I can generally whip these up pretty quick, I keep everything need on hand. Please remember though I don't have stores of flies lying around, they get too lonely not being fished.
Recipe
Hook: Standard dry fly hook, size 10.
Thread: 8/0 in a color that matches the marabou used for the tail and body.
Eyes: Small, 2.5mm, bead chain eyes.
Tail flash: 2 strands Krystal Flash. Use a color that compliments the marabou color.
Tail: A group of 12-25 marabou barbs.
Body: A group of 12-15 marabou barbs.
In the tying example I'm using a Mustad R50 barbless hook, black eyes, Uni olive thread and medium olive marabou. Vary your colors to match the the damsels in your local lakes.

The most important aspect to tying small flies using marabou is the selection of the right barbs from the right feathers. I won't go into all I've learned about marabou feathers over the last decade of geeking out with them, but here is an example of the prime feather for the Twisted Damsel and similar patterns. The Dr Slick 3 1/2" Razor Scissors are for scale

I've cut the feather to show the portion of this feather that's suitable for tying the Twisted Damsel. The butt of a big marabou plume has the overall length to the barbs and the barbule length that's needed to produce the profile we're looking for.

We'll use two groups of 12-15 barbs to tie this pattern. A simpler version, the Simple Damsel, just uses one group of barbs and offers a shorter profile, I use it when smaller damselfly nymphs are present, both have permanent places in my stillwater boxes, cold and warmwater.
Note the longer barbs on the left. Depending on where the feather was located on the turkey it came from determines which side will be longer than the other and the further it's located from center determines the length disparity between the barbs on either side of the quill (center stem).

Start the thread at the eye of the hook leaving a 3-4" thread tag which will be used later. Bring the thread about halfway back on the shank then bring it forward and build a substantial thread ball that will serve as the base for the bead chain eyes. position the tying thread in the center of the bump.

Tie the eyes onto the top of the thread bump using crossing thread wraps.

Here's a top view of the eye position, Note how there is a slight gap between the front edge of the bead chain eyes and the back edge of the hook eye.

Catch in the Krystal Flash just behind the bead chain eyes and secure it to the top of the hook shank back to the hook bend. Keep the thread tag on the tyers side of the hook as you wrap the Krystal Flash down. The process is a bit tricky the first couple times you do it but it gets easier with practice.
Cut the Krystal Flash to a length equal to the hook shank plus the hook eye.

The shorter barbs will be used for the tail, these are about 2"long. These generally have slightly fluffier tips than the longer barbs on a mature marabou feather. This adds more bulk at the tip of the tail.

Measure the barbs from the back end of the flash to the front of the hook eye. Tie the barbs in at the hook bend using a couple tight thread wraps.

Palmer the bundle of barbs up the hook, making the last wrap under the bead chain eyes and immediately up and back over the hook shank. This will cover the space under the eyes where they were tied onto the thread bump.
Loop the thread forward in a single turn and catch the marabou butts with a few tight thread wraps.
Trim the marabou butts and bring the tying thread to about 3 thread widths in front of the tail tie-in point.

We'll use the longer, slightly slimmer marabou barbs from the other side of the feather quill for the body of the fly.

Strip the barbs from the quill and measure the tips to the length of the hook shank only. Tie them onto the top of the hook shank with one or two solid thread wrap exactly where the thread was hanging previously.

Without pulling on the marabou barbs (they'll slip from under the thread wraps quite easily), fold them back over their tie-in point and make one wrap back to just behind the tail tie-in point, then make 3-4 thread wraps forward over the fold.

A close up view after the marabou has been folded backward and the fold covered with thread wraps. This locks the marabou securely in place for easier handling.

Pull the second bundle of marabou upward, then bring the tread tag up, alongside the marabou and twist it into a snug, tapered rope.
****NOTE***
Twist the marabou bundle by the very end of the butts. As you twist the bundle you'll see the barbules flair outward from the center of the rope. This is what forms the taper in the body of the fly.


Beyond the first couple wraps stroke the barbules back, out of the path of the nest wrap in order to get the fullest body possible. Wrap up to just behind the bead chain eyes.
At this point you should have enough to make one half wrap of marabou then bring it forward between the eyes and still have enough length to tie it off and trim.
****NOTE****
If you find the length it is a bit short, unwrap the marabou rope and wrap it back onto the hook leaving a slight gap between the wraps. The gaps will be filled visually by the fluffy barbules.

Dampen your fingertips with a damp paper towel and stroke the barbules back and out of the way for the final half wrap of the marabou.

Untwist the marabou rope as you bring it up and forward between the eyes. This frees the barbules which will act as the legs of the fly when fished.
Catch the marabou butts with a pair of tight thread wraps.

Lift the marabou butts and make 3-4 thread wraps between the marabou and the hook eye. This makes trimming the butts cleanly much easier.
The thread you see going upward here is the thread tag that was twisted into the marabou before wrapping it up the hook shank.

Once the marabou butts are trimmed I rotate the fly upside-down. This makes whip-finishing easier and it reduces the chance of your tying thread from slipping off the eye of the hook and the fly unwinding.

View from the gap side of the hook. This will be the top side when the fly is being fished.

The view from what will be the bottom side, fish's view, when the fly is being fished. The tail and legs pulsate as the fly swims through the water.

As a final touch on dark colored eyes, I hit the hole in the steel eyes with a diamond nail file. I'm not sure this makes a difference to the fish but it makes me feel better forming a pupil contrast.
And there you have it. let me know if any clarifications are needed. And by the way I do have these bead chain eyes in several colors for a very reasonable price.
Thursday, June 4, 2020
Birthday Surprise
You know your life is pretty peachy when an unexpected package shows up on your doorstep, a long, 4" square package. And, even though it's a plain, unmarked package from an unknown address, as an angler you know what's in it. That old familiar shape that says, "you've got a rod!"


My buddy Nick had been talking about the new Moonlit rods he's been testing out and catching a lot of redfish, speckled trout and bass with. He's also been testing, and catching the majority of those fish, with the steady stream of flies I've sent him, no strings other than some honest feedback.
When he mentioned I might like the 8'2", 6 weight model, there's been talk of a quick-shot streamer rod, I shrugged it off thinking "that would be nice, but a new rod isn't in my immediate future".
Then a few days later the box showed up. When I texted Nick his reply was "Happy Birthday".
Hot damn!
I got out and lawn cast the, sleek, burnt orange rod. I normally won't take the wrapper off the grip of a rod until I've had it for a while and feel like it's something I'll want to use. The wrapper came off the grip after 4 casts, the last of which I stepped off at 72'.

But then there's always the question of how it will handle casting with a heavy fly in addition to the line weight. This morning I got a chance to test that.
Living in the City of Billings has its perks, one of which is a surprising amount of bass and carp fishing for being within viewing distance of the Rocky Mountains, something that's a welcome perk when all the rivers in the vicinity are in the "chocolate milk" stage of run off. I chose one of the bigger ponds in the area because of the carp possibilities knowing a chunky carp would tell me what I wanted to know about how the Moonlit rod would handle a formidable fish.

I will admit that it didn't start out well. Graphite has been my fly rod material of choice for over a decade. My go-to 6 weight has been a self-built, 9' St Croix Legend Elite since 2010. It's a thunderstick with the power of a cannon, and the speed of a sling shot. Adjustment had to be made, but once they were I was firing 60-70 foot casts with relative ease, just at a slower pace.
The trick with a new rod, especially one with a completely dissimilar action to the rods you're used to, is to let the rod speak to you. Forget about the last rod you spoke to and just listen with your hand. The Moonlit spoke.
The outing was looking like a walk around the pond with a fly rod. The carp were in that ever too frequent F U mood, that mood when they seem to say "I've saw better than that from the 10 year old with worms man, come on!" they give you the fin and skedaddle for deeper water. 10 shots, 10 misses. That's fishing.

Giving up on the golden frustraters of freshwater fishing, I switched to my new old standby a Scimitar Minnow, it catches everything, except the F U carp. A couple small bass grabbed the 3/0 fly but couldn't quite get it in their maw around it. There had been quite a bit of commotion in an area of adjacent to some cattails all morning. I'd blown that shot the first time I approached by sliding on a substantial pile of goose poop, they're beautiful birds but man what a mess they leave! Anyway..........
With a "what the heck" attitude I laid the scimitar out beautifully, just to see if anybody was still home or they had drifted out deeper with the thinning of the clouds. Somebody was home, Mr Smallmouth. Unaware of the presence of smallmouth bass in this pond, I was surprised by the fight this fish put up, until I got a really good look at it and realized it was old Mr Bronzeback!

The Moonlit rod did a great job of handling what turned out to be a substantial smallmouth, especially for a shallow pond. Quite the extension to a great birthday. A new rod, another personal species caught on the Scimitar and my very first bass in Montana happened to be good sized and a smallmouth.
Despite what's going on across the country, life is pretty peachy, if you can just shut out the noise and get on with a little relief for a while.
Peace, Love & Fly Fishing,
J Wood
Subscribe to:
Posts (Atom)